Verify SQL Server Requirements
Introduction
During this lab, you will learn how to verify some of the SQL Server prerequisites that must be met to successfully create an Availability Group
Objectives
At the end of this lab, you will be able to:
- Ensure that SQL Server Enterprise Editions is installed on all replicas
- Verify that the databases (AdventureWorks and AdventureWorksDW) that will participate in the AG has full recovery model
- Enable AlwaysOn Availability Groups feature on all replicas
- Add Firewall exception for the HADR_Endpoint on all replicas
Estimated Time
20 minutes
Logon Information
Before Login make sure windows has Applied Computer Setting to all nodes.
Use the following credentials to login into virtual environment
Connect to AlwaysOnClient as CORPNET\Administrator using +++Pa$$w0rd as the password.
Click the Type Text icon to enter the associated text into the virtual machine.
Connect to AlwaysOnN1 as CORPNET\Administrator using Pa$$w0rd as the password.
Click the Type Text icon to enter the associated text into the virtual machine.
Connect to AlwaysOnN2 as CORPNET\Administrator using Pa$$w0rd as the password.
Click the Type Text icon to enter the associated text into the virtual machine.
Connect to AlwaysOnN3 as CORPNET\Administrator using Pa$$w0rd as the password.
Click the Type Text icon to enter the associated text into the virtual machine.
Connect to AlwaysOnDC as Administrator using Pa$$w0rd as the password.
Click the Type Text icon to enter the associated text into the virtual machine.
Change the screen resolution if required.
You may want to adjust the screen resolution to your own preference. Do this by right-clicking on the desktop and choosing Screen resolution and clicking OK when finished.
Screenshots in the lab instructions may appear with a lesser SQL version number than is installed in the lab environment where functionality is not affected.
Exercise 1: Ensure SQL Server Developer Edition is installed on all replicas and check if AlwaysOn is enabled.
In this exercise, you will learn how to ensure SQL Server Developer Edition is installed on all replicas and check if AlwaysOn is enabled.
Tasks
Login to the AlwaysOnClient virtual machine as CORPNET\cluadmin using Pa$$w0rd as the password.
Click the Type Text icon to enter the associated text into the virtual machine.
From the taskbar, open SQL Server Management studio (SSMS)

Connect to the first node: AlwaysOnN1
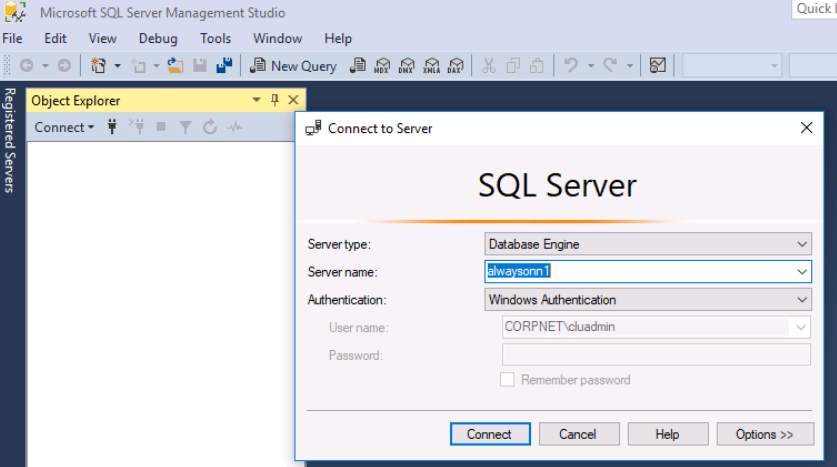
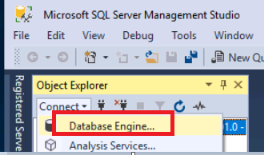
Connect to the other two nodes, AlwaysOnN2 and AlwaysOnN3. Click on the Connect button in the Object Explorer, and select Database Engine.
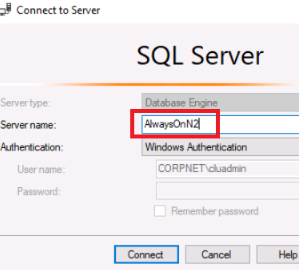
Enter AlwaysOnN2, and then repeat step 4 and enter AlwaysOnN3 to connect to both remaining nodes.
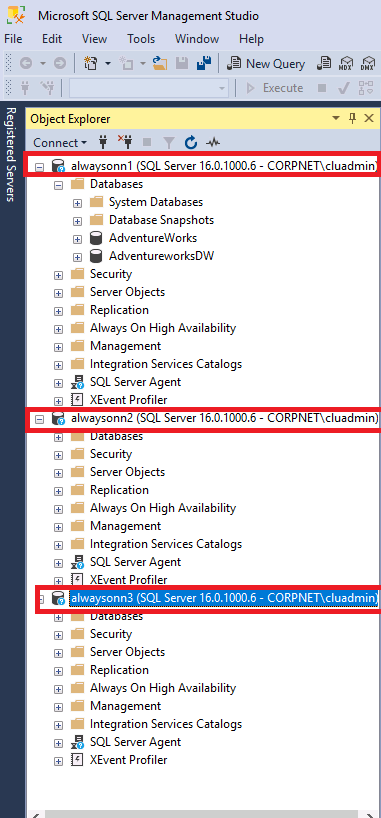
You should see all three nodes in the Object Explorer.
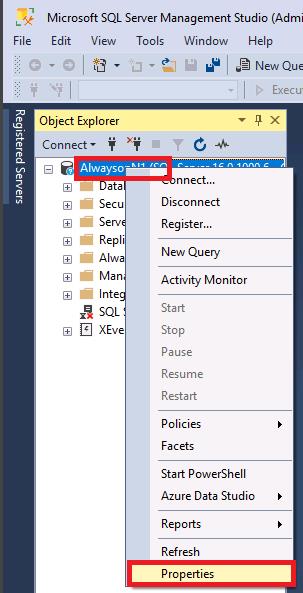
In the Object Explorer, right click the server AlwaysOnN1 and select Properties:
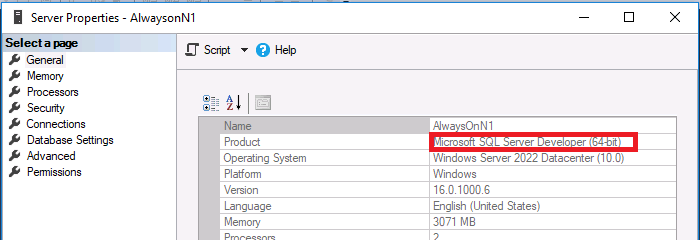
In the pane on the right, review the Product installed.
For full-featured availability groups, the product must be either Developer edition or Enterprise edition. All nodes should be the same edition.
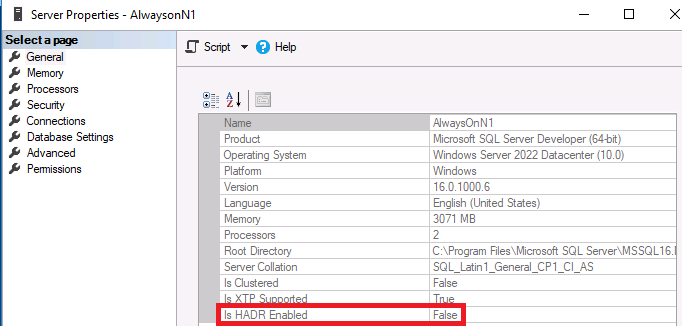
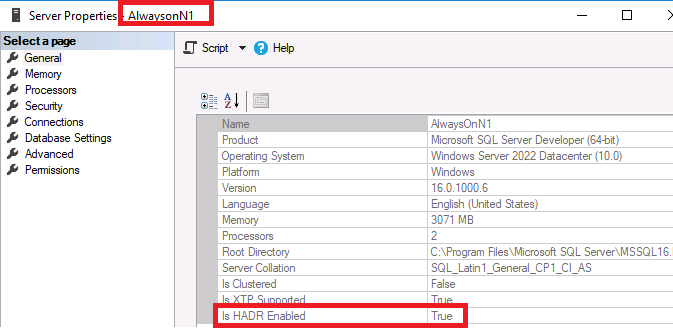
Now look toward the bottom of the list and find Is HADR Enabled. In order to configure an availability group, HADR must be enabled (True).
Close the Server Properties – AlwaysOnN1 window.
Repeat steps 7 - 10 for nodes: AlwaysOnN2 and AlwaysOnN3.
Are all three nodes the same edition? What edition are they?
Are any of the nodes enabled for AlwaysOn ("IsHADREnabled" = True)?
Congratulations!
You have successfully completed this exercise. Click Next to advance to the next exercise.
Exercise 2: Verify databases are in full recovery model
In this exercise, you will learn how to verify databases are in full recovery model
Tasks
In SSMS Object explorer, click on AlwaysOnN1
Expand the node if it is not already. Click the "+" next to Databases to expand the databases node and list the databases. You should see two user databases, AdventureWorks and AdventureWorksDW.
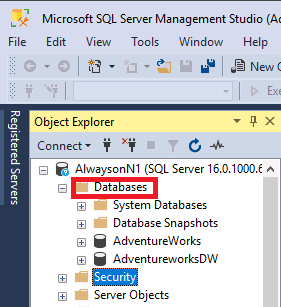
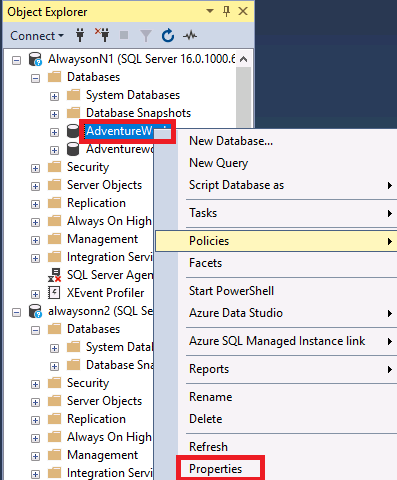
Left click on the AdventureWorks database, and then right click and select properties
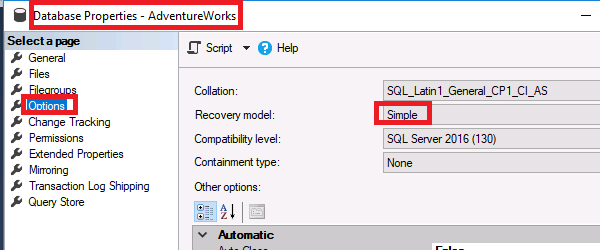
On the Select a page section of the properties dialog, select Options. On the right, look at the recovery model:
If it is not FULL, select the drop down arrow and select FULL.
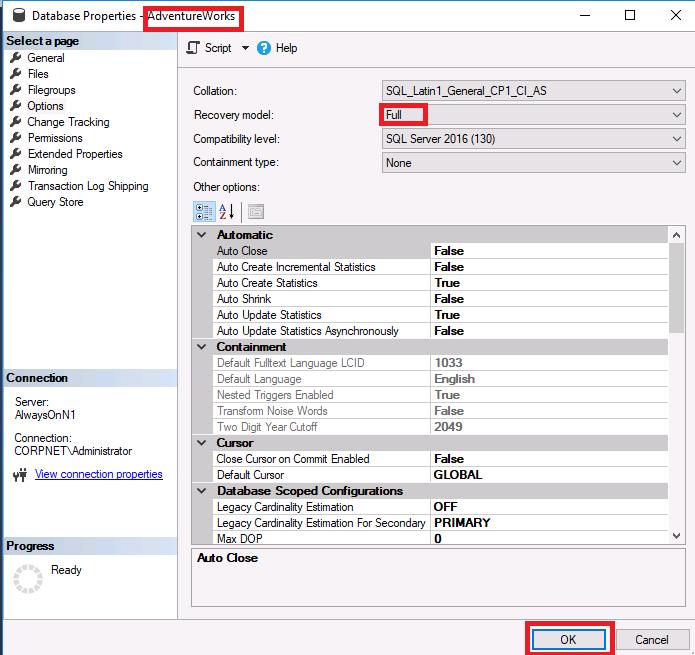
Press the OK button at the bottom of the dialog box to save.
Repeat steps 3 - 5 for the AdventureWorksDW database to ensure it is in FULL recovery mode.
There is no need to check servers AlwaysOnN2 and AlwaysOnN3 as they do not have the databases yet.
Congratulations!
You have successfully completed this exercise. Click Next to advance to the next exercise.
Exercise 3: Enable AlwaysOn on all replicas
In this exercise, you will learn how to enable AlwaysOn on all replicas.
Tasks
After upgrading to Windows 2022, Enable-SqlAlwaysOn command doesn't work and it is logged as bug by Re: SQL2022 CTP using PowerShell to enable AlwaysOn - Microsoft Community Hub Hence, the guidelines have been modified to require that AlwaysOn to be manually enabled on every machine. Once PowerShell bug is fixed we will bring PowerShell command back in instructions.
Connect to AlwaysOnN1 as CORPNET\Administrator using Pa$$w0rd as the password.
Click the Type Text icon to enter the associated text into the virtual machine.
Open the SQL Server Configuration Manager by clicking on the
 icon on the Taskbar
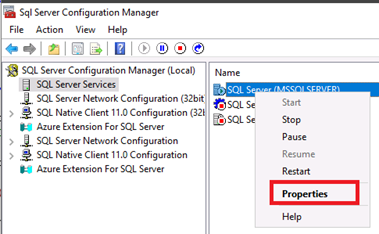
In the Right pane , Right click on SQL server Services and then select properties
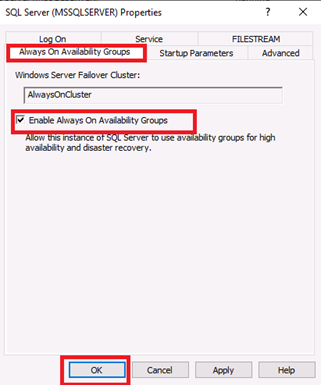
In SQL Server Properties windows , click on tab "Always On Availability Groups" , Check the checkbox "Enable Always On Availabilty Groups" then click on OK Button
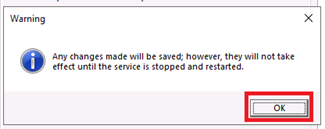
You will get a Warning message click on OK Button
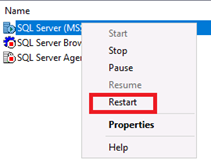
Restart the SQL Server Services , If required Start "SQL Server Agent" Services as well
Repeat all above steps on AlwaysOnN2, and then again for AlwaysOnN3.
Now connect to AlwaysOnClient as CORPNET\Administrator using Pa$$w0rd as the password.
From the taskbar, open SQL Server Management studio (SSMS)

Connect to the all node: AlwaysOnN1, AlwaysOnN2 and AlwaysOnN3
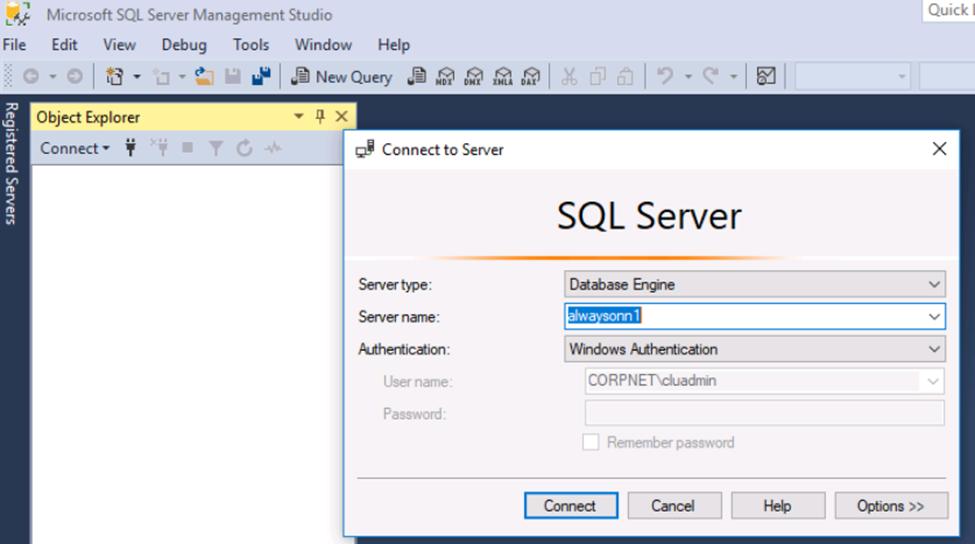
You should see all three nodes in the Object Explorer.
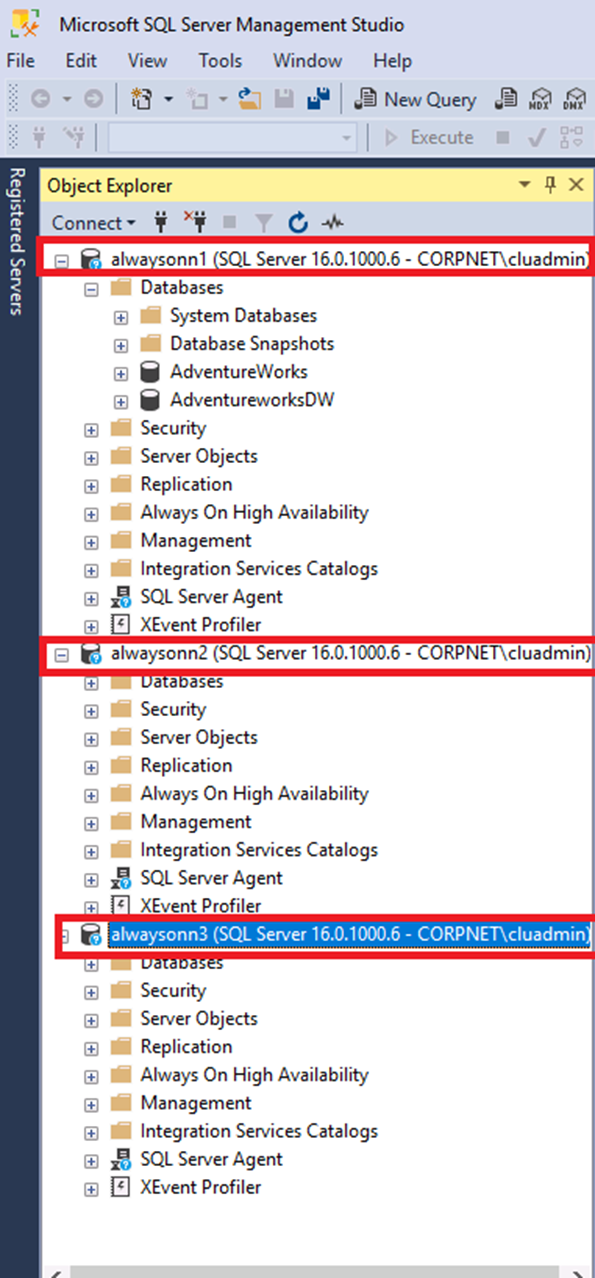
Go to each server in the Object Explorer one at a time. Right click the server and select Properties. (For a review of the steps and screen shots, refer back to Exercise 1). Review the value for IsHADREnabled to verify it shows TRUE.
Congratulations!
You have successfully completed this exercise. Click Next to advance to the next exercise.
Exercise 4: Add Firewall exception for the HADR_Endpoint on all replicas
In this exercise, you will learn how to add Firewall exception for the HADR_Endpoint on all replicas.
Tasks
Login to the virtual machine for the first node, AlwaysOnN1, as CORPNET\cluadmin using Pa$$w0rd as the password.
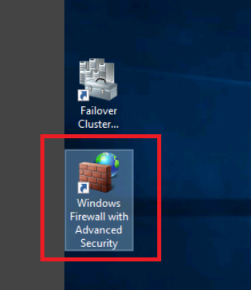
Open the Windows Firewall with Advanced Security application by double clicking on the Windows Firewall icon on the desktop.
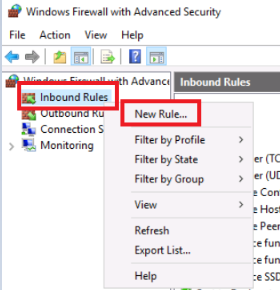
In the left pane, left click on the Inbound Rules, and then right click to select to open the wizard for adding a new inbound rule
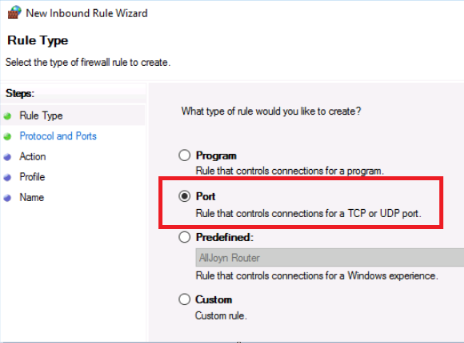
For Rule Type select the second option, Port, and then click the Next button at the bottom of the dialog window.
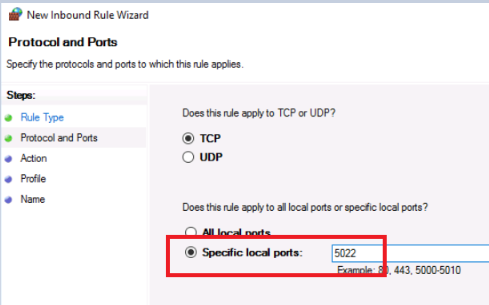
In the text box next to Specific local ports: type 5022 and press the NEXT button at the bottom of the dialog window.
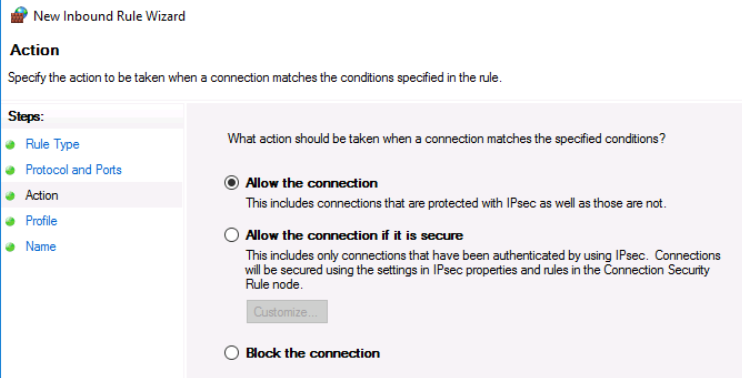
On the next screen for the Action, leave the default selection Allow the connection selected, and press the NEXT button at the bottom of the dialog window to proceed.
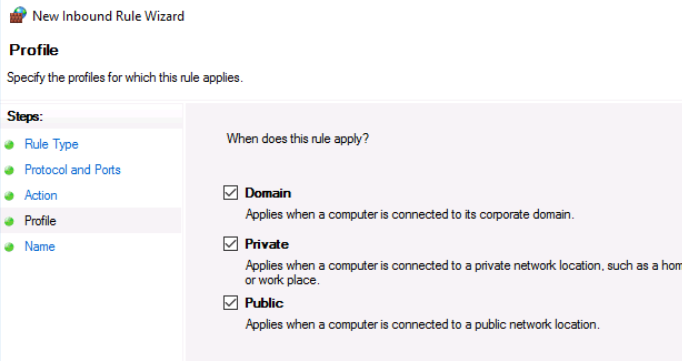
On the Profile screen, leave the default options selected for this lab. (Domain, Private, and Public are all selected.) Proceed to the next screen in the wizard by pressing the NEXT button at the bottom of the dialog window.
On the Name screen of the wizard, enter the name HADR_ENDPOINT and then press the FINISH button at the bottom of the dialog window. The rule will now be active.
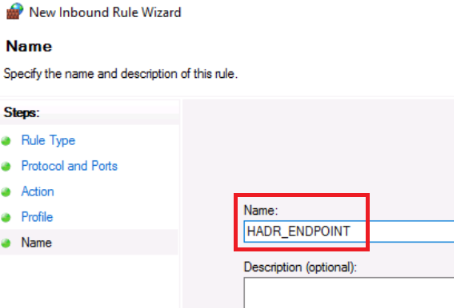
After closing the wizard, you should see the new rule at the top of the list with a check mark next to it indicating the rule is active and enabled.
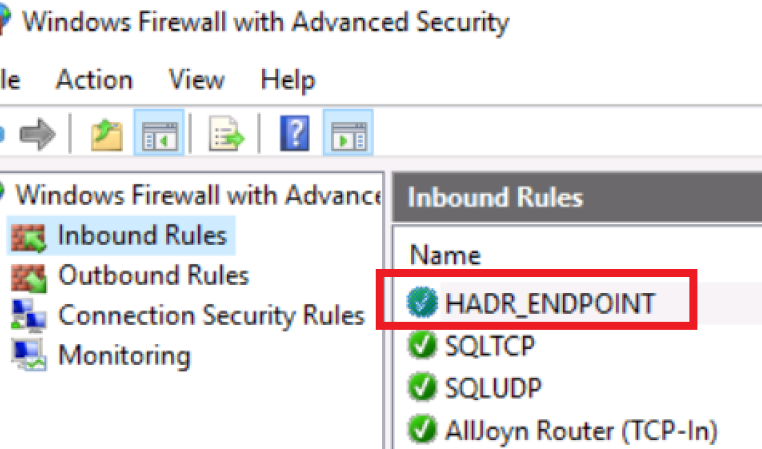
Repeat steps 1 through 9 for the other two nodes, AlwaysOnN2 and AlwaysOnN3.
Congratulations!
You have successfully completed this exercise. You can move to the next lab.